Dashboard configuration
These are the only step you'll have to take on Thor's administration dashboard. After you've completed doing what follows, you won't need to log into Thor except when you have to create/modify/delete your chargeboxes or your RFID cards.
Get an username and password#
Of course if you don't have access to the administration dashboard yet you'll have to contact our commercial office. When you'll be given an username and password, you will be able to log into the dashboard.
Make your chargeboxes private#
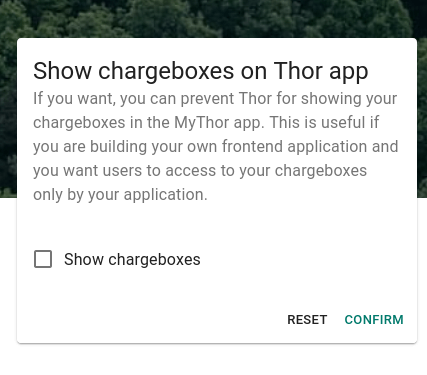
As we said here you might want to hide your chargeboxes from the Thor's end users application and allow charges only from your own application. This can be easily done by visiting the Customization page and uncheck the Show chargeboxes field.
Configure a free payment type#
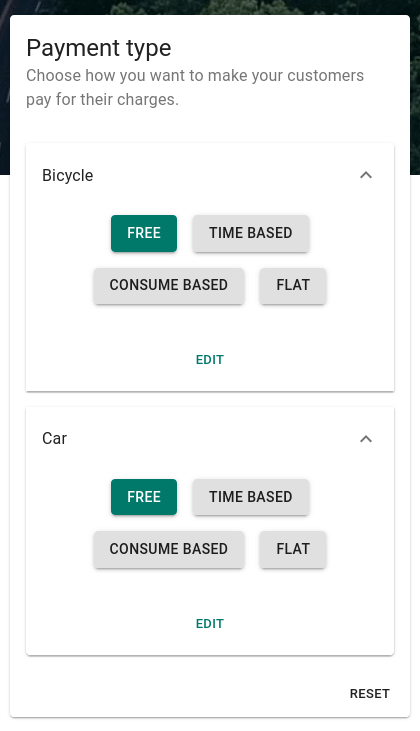
Charges can be started via API only on chargeboxes that don't require a payment. On Thor you can configure a default payment type for your car and bicycle chargeboxes in the Customization page, and for each chargebox you've created override the default payment type if you want. So be sure to check that the default payment type looks like the screenshot below.
Configure the API integration#
This is the toughest, but fortunately you'll have to do it just one time. In the Development page of the administration dashboard you'll have to configure how Thor and your system will communicate.
Every time you edit the integration parameter you must submit your modifications, otherwise they won't be taken into consideration.
Requests to Thor#
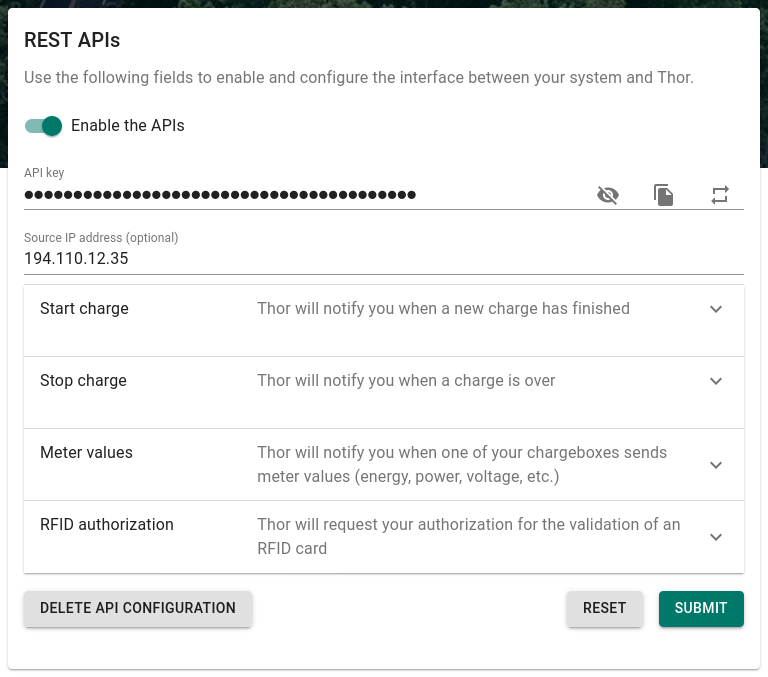
Every HTTPS request that you make to Thor requires an X-Api-Key header with a key that you can generate here. You can renew the API key every time you want by pressing the icon.
The text field Source IP address can be optionally filled with the IP address of the server you'll use to make requests to Thor via REST API. This is done to add another security level to the infrastructure: every request with your valid API key that doesn't come from this IP address won't be considered.
Requests from Thor#
Thor can send you requests when something related to a charge from one your chargeboxes happens. There are 4 notifications you can configure:
- Start charge: Thor will notify you when a new charge is initiated
- Stop charge: Thor will notify you when a charge has finished
- Meter value: Thor will notify you when one of your chargeboxes sends meter values (energy, power, voltage, etc.) related to a charge
- RFID authorization: Thor will request your authorization for the validation of an RFID card
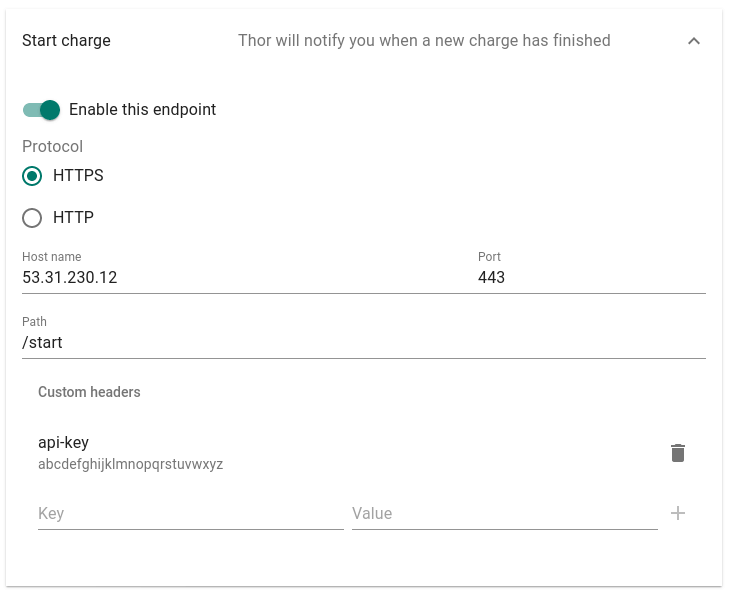
Every endpoint can be enabled or disabled. If enabled, you must tell Thor where to send the request by specifying the protocol you implement (HTTP or HTTPS), the host name or IP address of your server, the port where your application is listening and the path for each type of request. If you want you can configure some custom header that Thor will use when sending a request.
This is an example of an endpoint configuration:
Create your chargeboxes and RFIDs#
Now that you have configured your API integration you can start creating chargeboxes in the Chargeboxes page. You can monitor at any given time the status of your chargeboxes, edit or delete them.
The same goes for RFID cards.
A note about RFID cards#
If you choose to check on Thor the RFID cards for the charges they must be first created on it, every RFID can also be associated with a registered user on Thor and given a budget that will be used to handle payments. If you choose to check on your system the RFID cards, you can choose if you want also the check of Thor or not.
info
If you configured the RFID authorization in the Requests from Thor section, when a chargebox notifies a new RFID, Thor will first check if the ID is in its database (if you want the double check) and then ask for authorization from your system.
And that's it!#
Now you are ready to start implementing your application and make it talk with Thor!